DoIT TechPortal Banner

 mySU Portal Logo


 This link will work for anyone in Southern University System via Single Sign-On.

mySUPortal (powered by Pathify) provides a personalized, centralized dashboard that guides the entire student journey — from applicant to alumni. Students only see information relevant to them from Banner to Email to Moodle, mySUPortal is a one-stop shop!

The right information, to the right person, at the right time — on any device. mySUPortal brings it all together for students and staff!


Are you having problems logging in to Banner?

Try these steps:

  1. Clear your cache.

    • Chrome
      • Click the ‘THREE DOT’ icon from the top right
      • SETTINGS from the menu
      • Click ADVANCED at the bottom
      • CLEAR BROWSING DATA
      • Check the box next to CACHED IMAGES & FILES
      • Click CLEAR DATA

    • Edge
      • Click the ‘THREE DOT’ icon from the top right
      • Click SETTINGS
      • PRIVACY & SERVICES in the left tab
      • CHOOSE WHAT TO CLEAR from the bottom right
      • Check the boxes for items to delete
      • Click CLEAR NOW

    • Firefox
      • Click the ‘THREE LINE’ icon from the top right
      • Click OPTIONS
      • Click PRIVACY & SECURITY from the left tab
      • Click CLEAR DATA in the COOKIES & SITE DATA section
      • Check the box next to CACHED WEB CONTENT
      • Click CLEAR

    • Safari
      • Click DEVELOP from the menu at the top
      • Click EMPTY CACHES.


  1. Use a private browsing session:

    • Chrome
      1. Select the Chrome Menu (three vertical dots) from the upper-right corner and then select New Incognito Window.  Alternatively, from the Chrome menu, select File New Incognito Window. Or, press Ctrl+Shift+N (Windows) or Command+Shift+N (Mac).

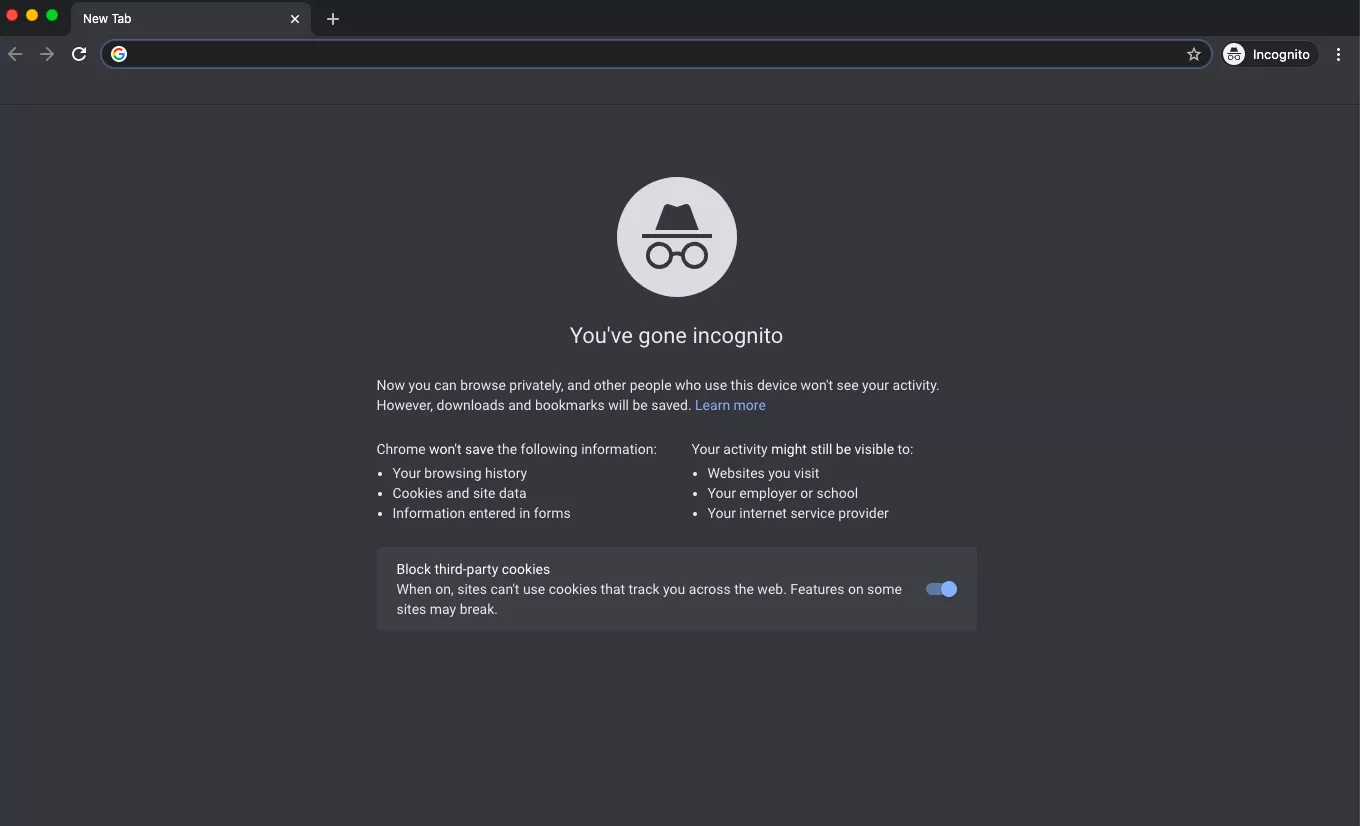
      2. A window opens, explaining the Chrome Incognito mode.

        Browser 1
      3. To open a link in an Incognito window, right-click it (or press Control+Click on a Mac), and then select Open Link in Incognito Window.

      4. To exit Incognito mode, close the browser window or tabs.
        To activate Chrome Incognito Mode on an iOS device, tap Menu New Incognito Tab. On an Android device, tap More New Incognito Tab.
         
    • Edge - InPrivate Browsing
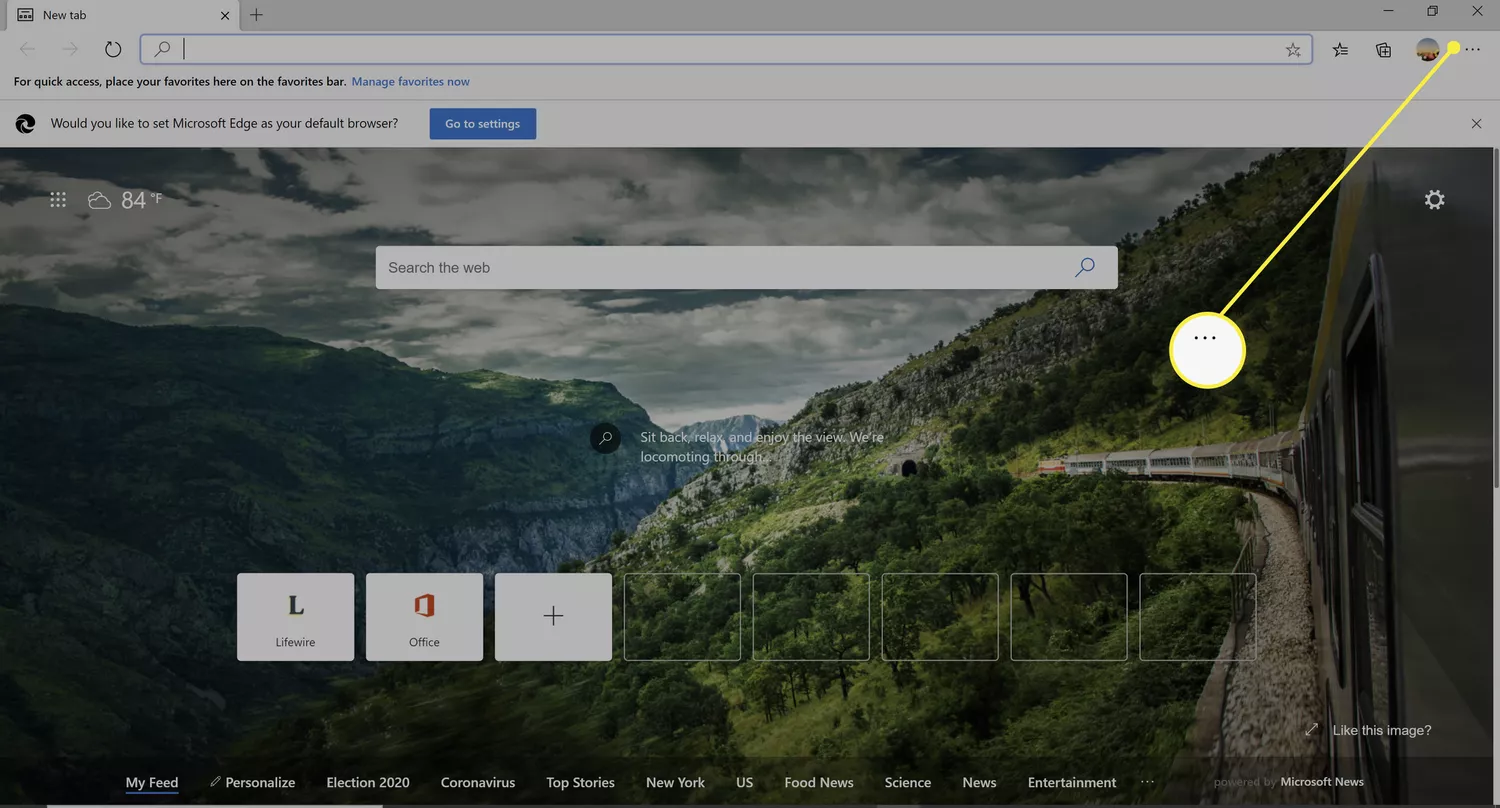
      1. Open the Edge browser and select the More Actions menu (three dots).

        Browser 2

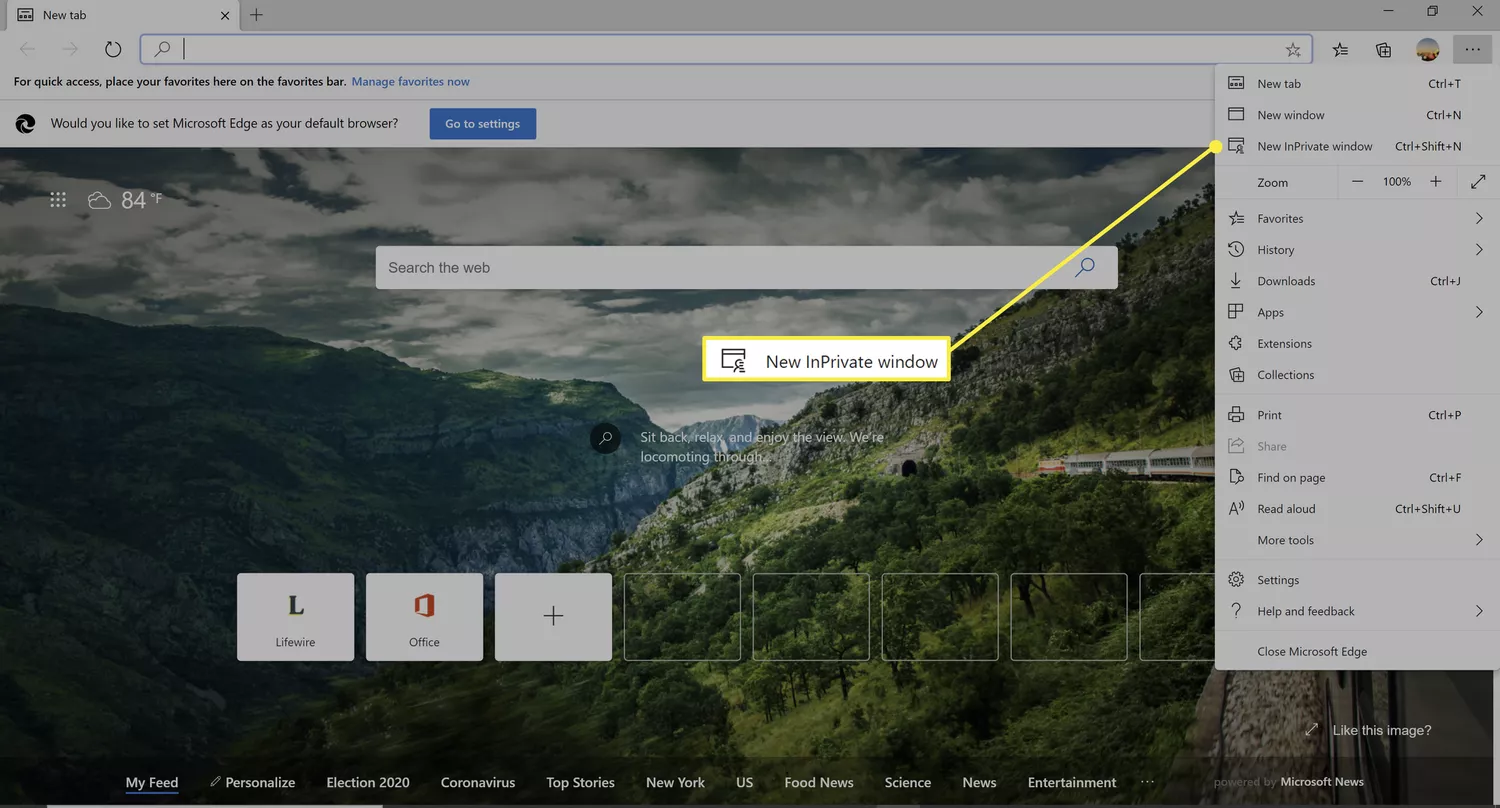
      2. Select New InPrivate Window.  On a Windows computer, use the Ctrl+Shift+keyboard shortcut to enter an InPrivate Browsing window quickly.

        Browser 3

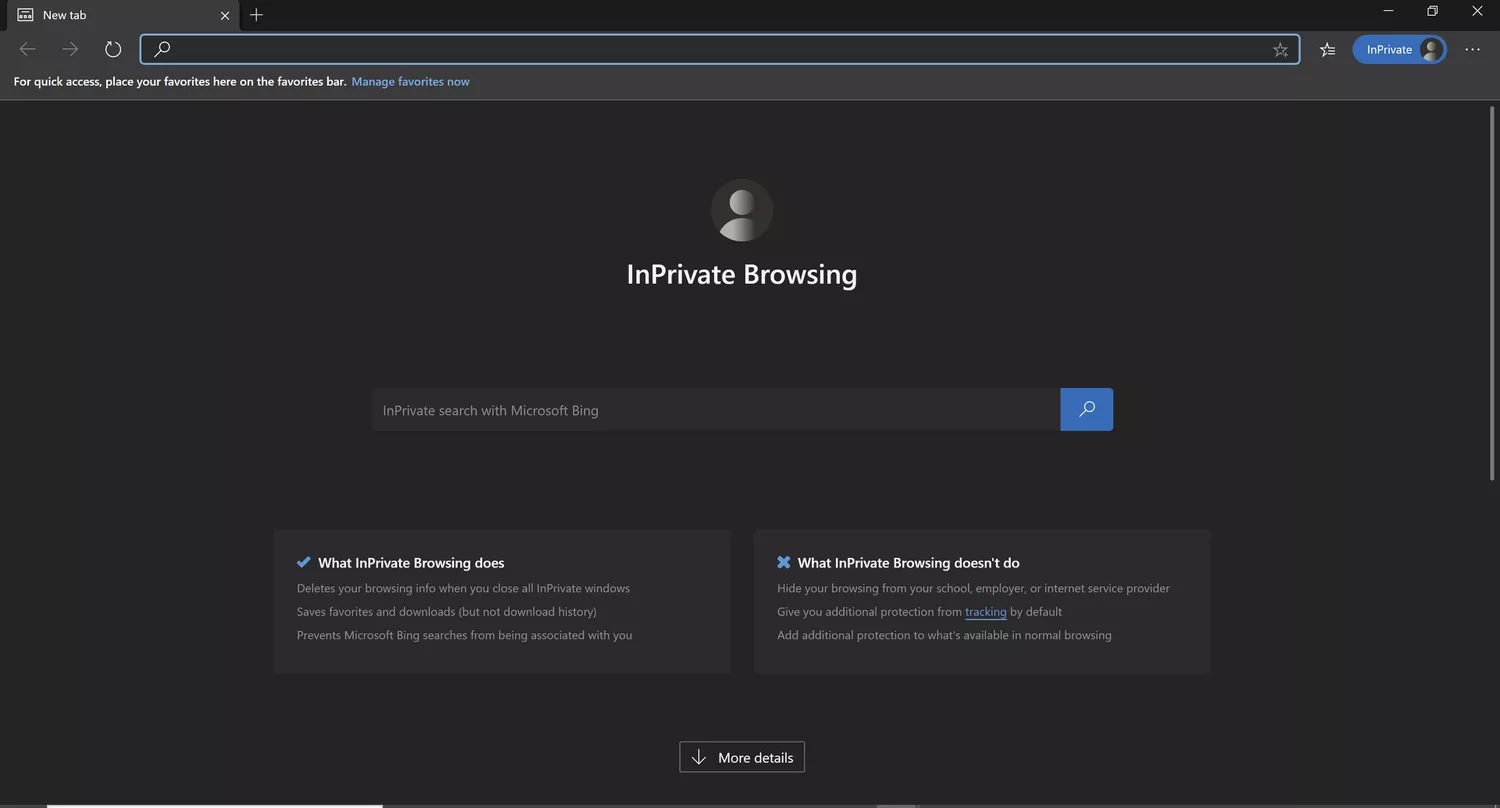
      3. A window opens, explaining the Edge InPrivate Browsing mode.

        Browser 4

      4. To open a link in the Edge InPrivate Browsing mode, right-click it (or press Control+Click on a Mac) and select Open in InPrivate Window.  To enter InPrivate Browsing mode in Edge on an iOS or Android device, select the Tabs icon and then tap InPrivate.

    • Firefox - Private Browsing Mode
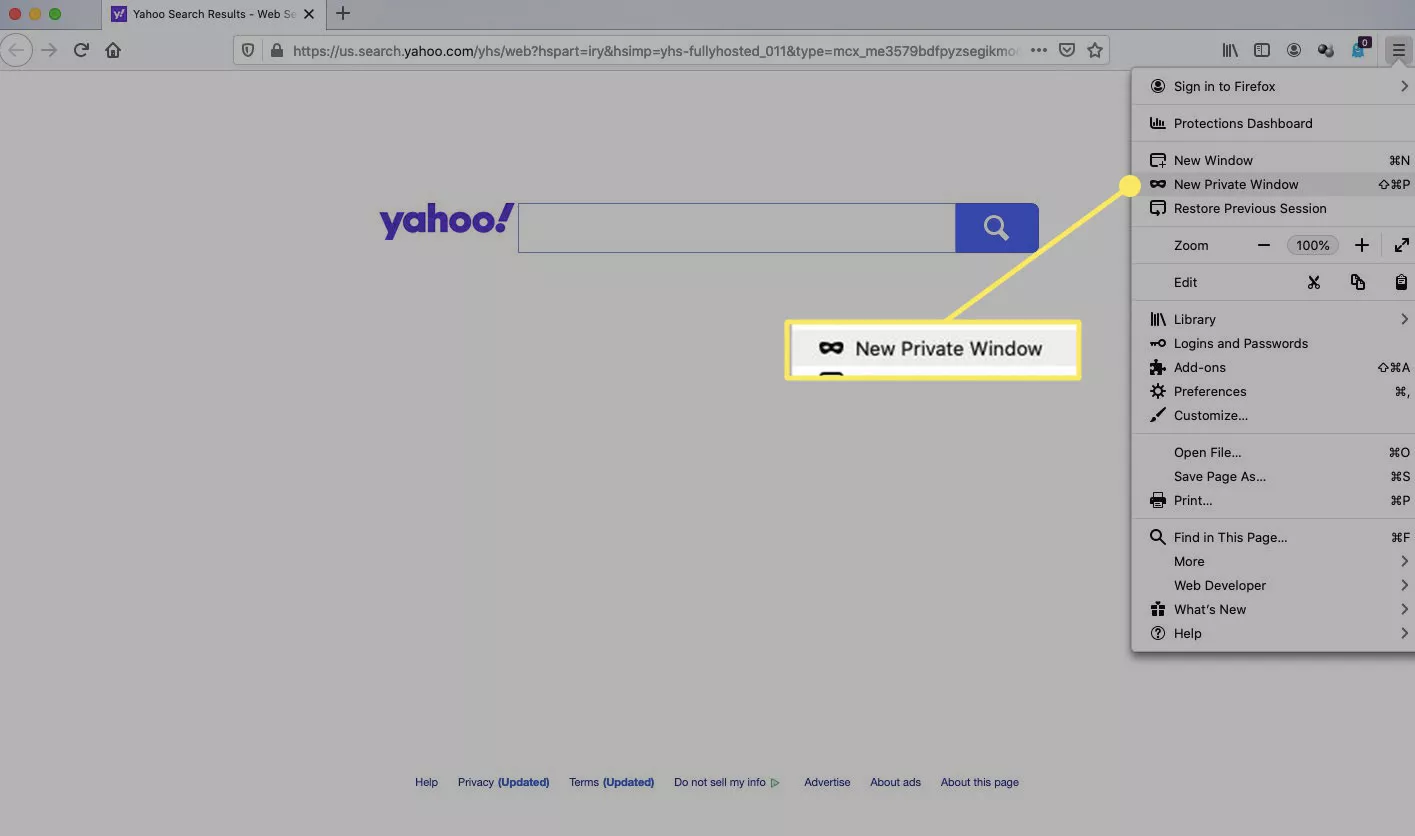
      1. Select the Firefox Menu (three vertical lines), and then choose New Private Window.

        Browser 5

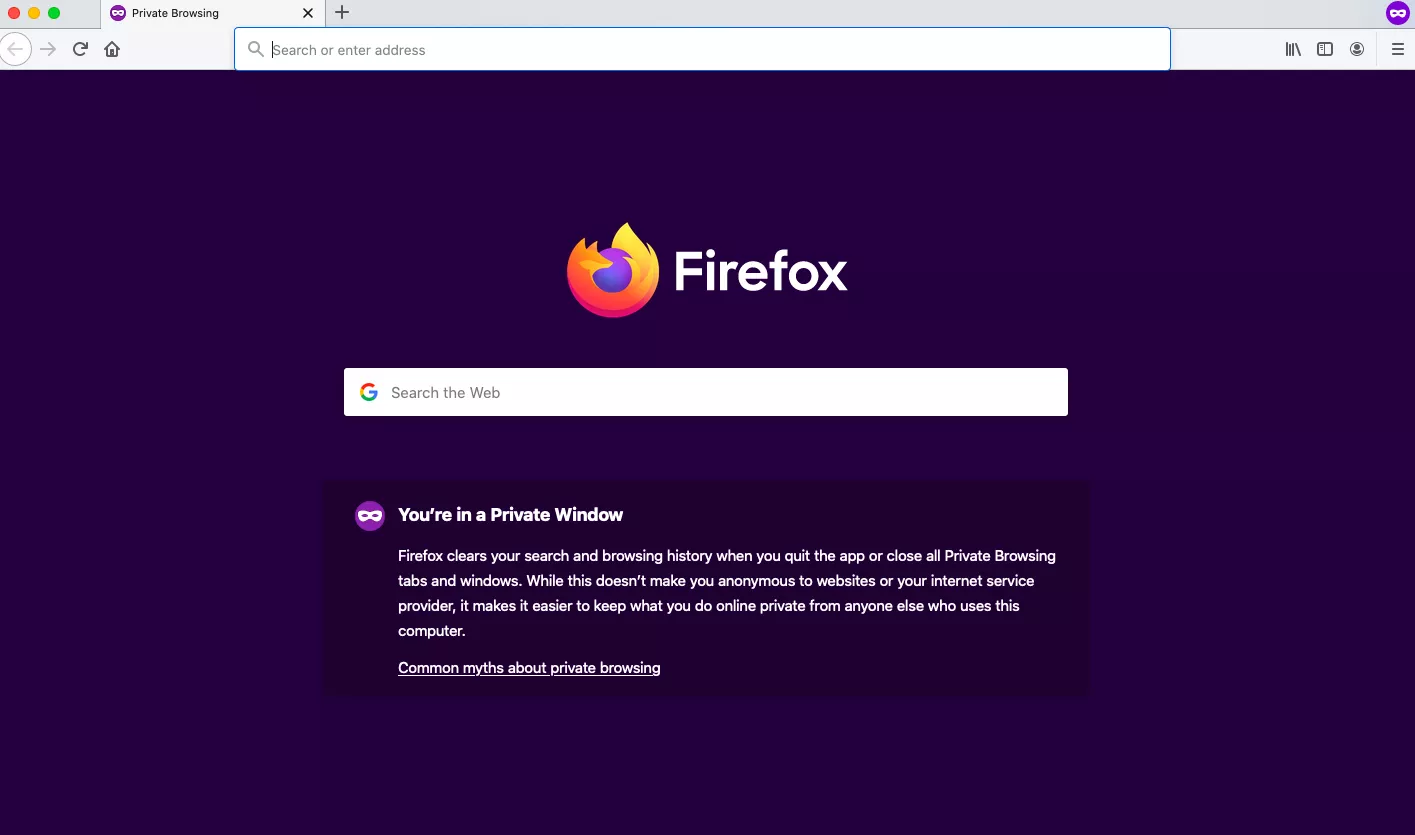
      2. A Firefox private browsing window opens.  To quickly open a Firefox Private Browsing window, press Shift+Command+P on a Mac or Control+Shift+P on a Windows PC.

        Browser 6

      3. To open a link in Private Browsing mode, right-click it (or press Control+Click on a Mac), then choose Open Link in New Private Window.

      4. To enter Firefox Private Browsing mode on an iOS device, tap the Tabs icon at the bottom of the screen, and then tap the Mask icon. On an Android device, tap the Mask icon at the top of the screen.

    • Safari - Private Browsing mode

      1. Open Safari on a Mac.

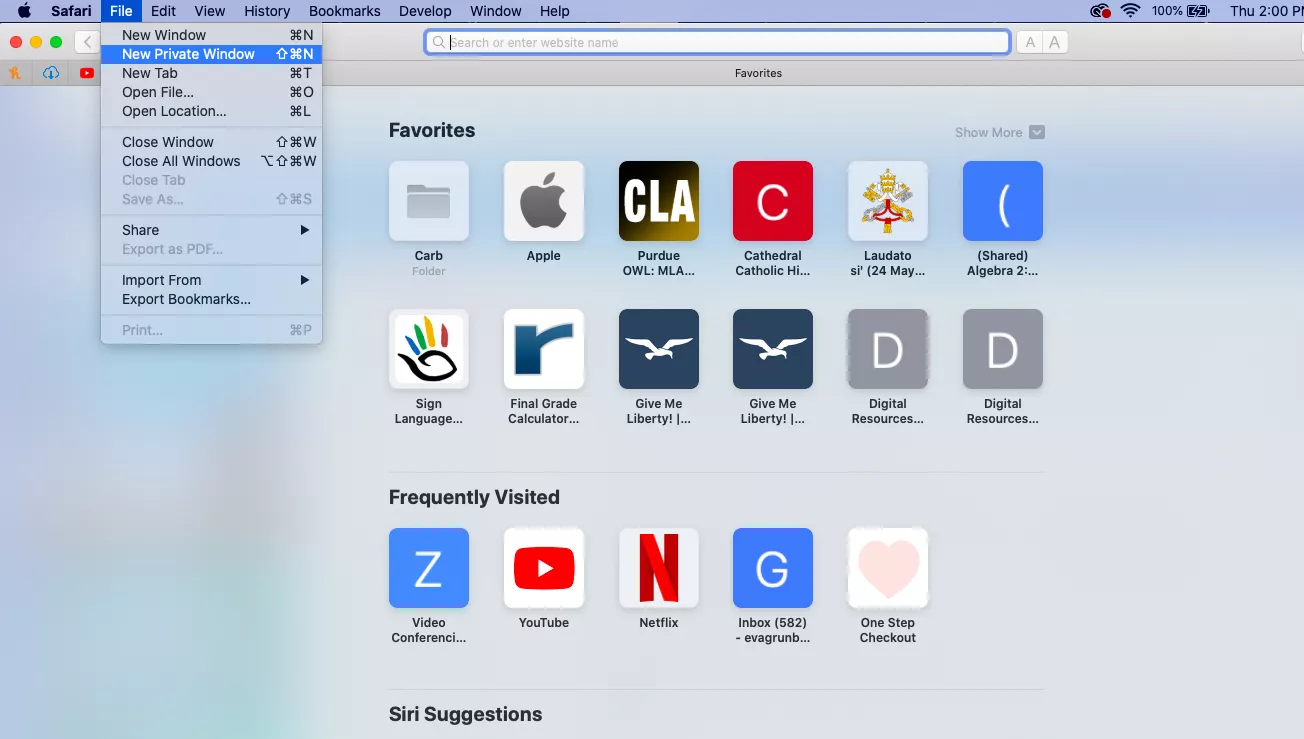
      2. From the menu bar, select File New Private Window.  Press Shift+Command+to quickly open a private browsing window.

        Browser 7

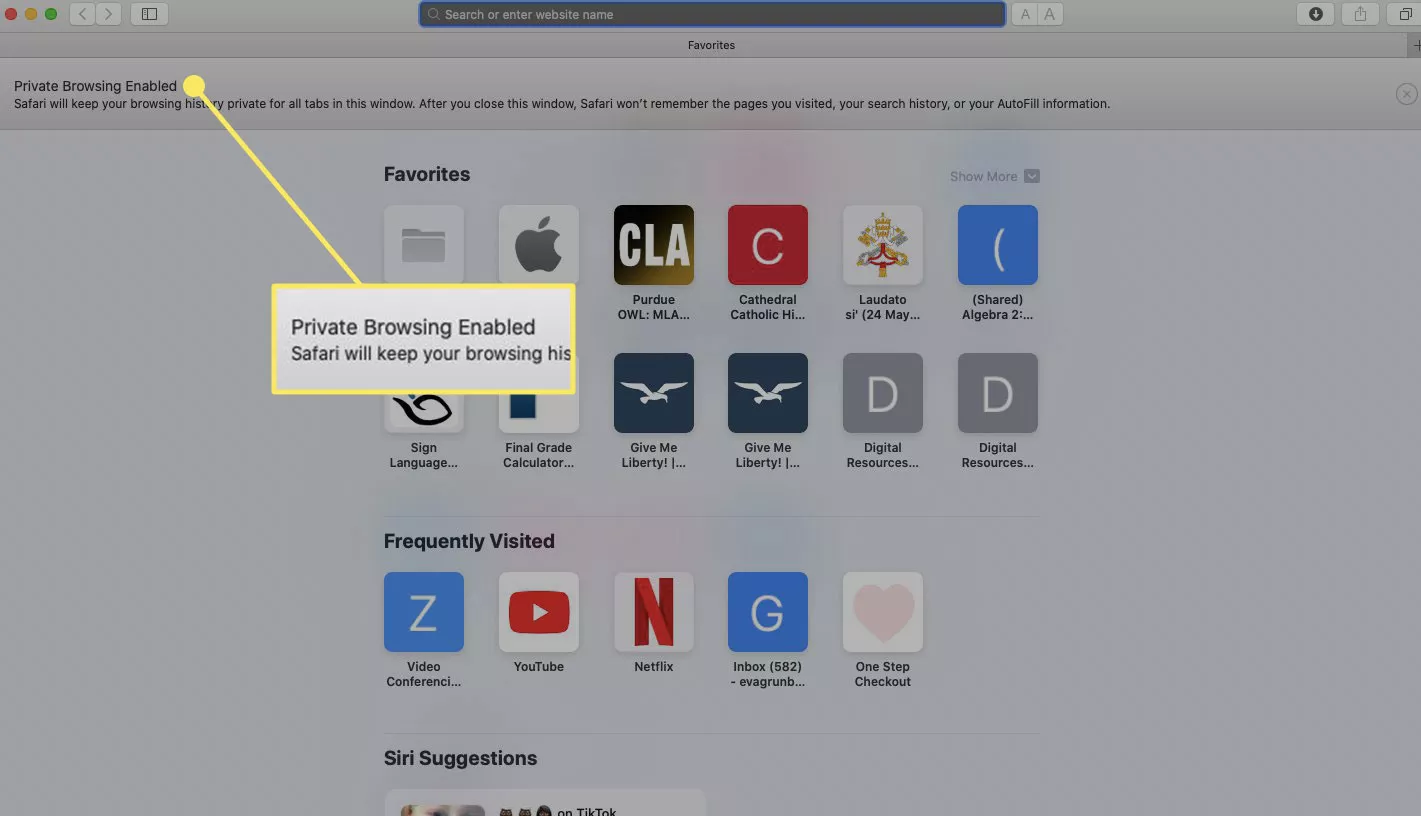
      3. A window opens with a darker search bar and a message that Private Browsing is enabled.

        Browser 8

      4. To open a link in a private window in Safari on a Mac, hold the Option key and right-click the link (or hold the Control and Option keys and select the link), then choose Open Link in New Private Window.


  2. Call or Email your IT Help Desk